02 December 2013

The Next Big Project: The Master Bathroom

Our bathroom really shouldn't be called a master bathroom. Seriously. It just doesn't deserve the name. 

For starters, it's tiny--5' x 8'. There are no windows. The poorly laid tile has disintegrating grout (thanks, previous owners). You can't get out of the shower if someone else is at the sink. It's hard to access half of the storage under the countertop since the cabinet doors hit the side of the toilet. 

In short, it's anything but masterful. 

While we can't do anything about the size, we certainly can do plenty to spruce up the fixtures and layout. Currently, the bathroom has light blue walls and white fixtures. The countertop is a nasty, dingy beige straight out of the early 80s. 

We want to go clean and modern, so everything is going to be white after the remodel. Since there are no natural lights (and no way to incorporate them since it's a completely interior room), I am going to use as much white as possible. 

The only thing that we're majorly changing is a complete demo of the existing countertop, which stretches across one entire wall. We'll replace that countertop with a smaller vanity and a floor-to-ceiling open shelving unit for more storage. We'll also take out the existing door and put in a pocket door (so two people can stand in the bathroom at once!).

The new layout: 

The rest will be cosmetic:
  • We're going to replace the shower/tub combo with a newer, fresher one. There will still be a shower head and a tub; however, rather than going with a clunky plastic molded combo set, we'll have a tub with tiled walls around it. So much better looking than our current set up!
  • We'll replace the old beige tile with clean, smaller black and white tile. 
  • The old towel rack over the toilet will be replaced with a smaller, more functional hanger/ shelf combo.
  • We'll paint all of the walls a very clean white. 
  • We'll take off the popcorn ceiling and finish with a smooth ceiling. 
  • We'll replace the giant 80's mirror with a framed modern one. 
  • We'll replace the ancient yellowing bathroom lights with brighter, more flattering ones.
Some of the key pieces we'll be using:

Ruffled Bath Curtain from Target
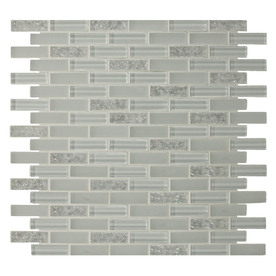
(For the shower backsplash detail) GBI Stone subway tile from Lowe's. We also have this in our kitchen, and it is gorgeous.
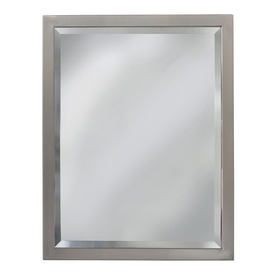
Allen + Roth Brushed Nickel Mirror from Lowe's.
Hemnes/ Vitviken Vanity from Ikea
Hemnes 5-shelf unit from Ikea


Pictures to come when we start the demo! I'm hoping we'll begin before Christmas, which would be an awesome present.

21 November 2013

Why, Hello There...

It's been a while since I updated. But I have two excellent excuses, I promise!

The first:
Little baby sweetness at her newborn photo shoot.
We now have a junior member of our renovation and remodeling team: our daughter was born this past June, and she has been the center of our lives for the last five months. She's so much bigger than that photo now, and so much more mobile! We're out of the haze of newborn baby and back at our renovations. Finally! 

And the second:

Our house decided that it hated us and flooded back in April. I was seven months pregnant, and suddenly homeless (until we showed up on my parents' doorstep--surprise!). It took almost three months to get the house back in shape. Part of the reason it took so long was that the insurance company didn't want to cooperate and the other part was due to my husband working by himself to fix everything. With only two months left to go in my pregnancy, I could barely see my feet and was super cranky, so there's no way I could have assisted him with all of the repair work.  More on THAT whole process in the coming days. 

Before the baby and the flood, we did get a few projects done, including the nursery and the kitchen. I was a terribly tired pregnant woman, so I didn't post any of the pictures like I normally do, but rest assured that those will be coming, too. (I'm only about 6 months late, right?)

We also have several fun projects coming up, including a porch spruce-up, additions to the upstairs hallway, and a complete renovation of our master bathroom. Keep checking back!


09 August 2012

Kitchen Decorations: A Final Decision

A while back, I shared the ideas that I had for the kitchen. I wanted something large for the huge expanse of beige wall that was completely blank, but I also wanted the decoration(s) to be on par with the travel-theme and red/beige/black color scheme that the den had. Since the den and kitchen are basically one big room, it's important that elements from both mix and match appropriately.

The final decision:

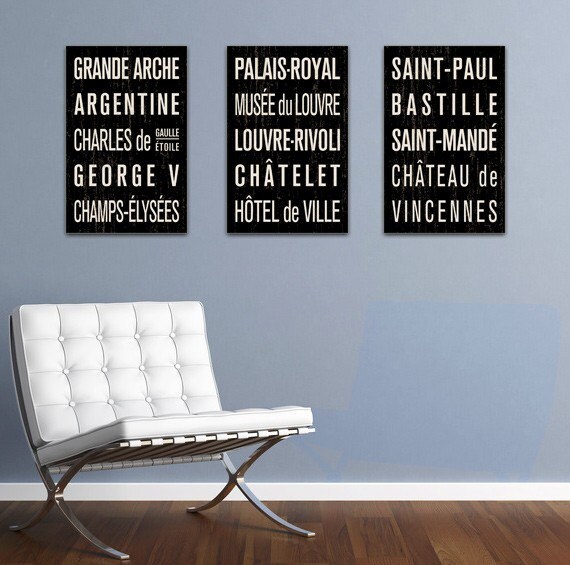
I found the travel sign on clearance for $30 at Marshalls. It's actually MUCH bigger in person than it looks in this picture, but it fits the space without overwhelming it. 

The mirror is actually gorgeous up close. The frame is one huge piece of wood that has letterpress style letters carved into it. LOVE IT! It was also a Marshalls HomeGoods find (but unfortunately wasn't on clearance...clearly, that factor didn't make or break my decision to buy it!). I love HomeGoods because you just never know what you're going to find in there. 

The red curtains match the brown ones in the living room, so they're coordinating without being matchy-matchy. They're 84" curtains by Waverley from Lowe's (they don't actually have the curtains anymore online, but they might still be in stores). Don't forget to hang those curtains a couple of inches higher than the window box--it will make the room look bigger. Promise!

The chargers, napkins, napkin rings and runner are all from Pier One. They make the BIGGEST difference in making your table more personal. The crystal bowl (Shannon crystal by Godinger) is actually part of our wedding crystal, but I thought it looked nice there. 


Now, to get the hanging pendant light above the table and replace the floors and we'll REALLY be in business!

Table: Ashley Furniture
Curtains: Lowe's
Sign: Marshalls HomeGoods
Mirror: Marshalls HomeGoods
Runner, chargers, napkins and napkin rings: Pier One
Crystal bowl: Bed Bath and Beyond

07 August 2012

Bedroom Collage and Online Thrifting

Overall, what our house needs right now is accessories. As we still have lots of big projects still in the chute (the hallway renovation, the kitchen re-do and an overhaul of both upstairs bathrooms), the paintings, photos and other wall decorations have been slow in coming. One thing at a time, right?!

For our bedroom, I put together a collage of things for the wall to the left of our bed. I found a cute subway-style sign to match with a vintage metal "D," a vintage scalloped metal frame and a three picture frame. 

The sign says (among other cute things): "You're the cheese to my macaroni, you are the horizon to my sky." So perfect for us! 

As for the two metal elements, I got them both through Etsy. I know a lot of people turn to the site for cute homemade things, but they also have tons of shops that deal exclusively in vintage and antique items. I love digging through an antiques store or Goodwill as much as the next person, but those searches can be annoying when you know exactly what you want, but can't find it (I have this particular problem with vintage Pyrex. I want it but I can't EVER find it!!). Etsy solves that problem for interior designers who want that perfect vintage piece but don't have the time or patience to go thrifting. Use it, love it, and thank me later!

But back to the decorating, the room is still not perfect--I feel like it's a little off somehow--but it's a work in progress (like most things around here). I haven't found anything that I love to put in the middle of the frame, but I'm searching. I'd like a little fleur de lis or something. I guess I'll know it when I see it. 


Decorating Details:
Black frame: Target
Silver scalloped frame: vintage find on Etsy
Metal "D": vintage find on Etsy
3 shelf bookcase in white: Walmart
Subway sign: Signals

27 December 2011

Welcome to Our Humble Abode

In addition to our work on the second bedroom and the living room, we've also been working on the entryway. 

Before.

After.

We picked up the little sandstone owl bookends at the Portobello Road Market in London. 

Aren't they the sweetest little things? They survived the transatlantic flight wrapped about ten times in our sweaters. 

I also found this classic British telephone decoration at Hobby Lobby this past weekend:
LOVE IT!

We've been working on the house since March 2011, and I'm just now feeling like bits and pieces of it are coming together to look like a real house. Here's to 2012 and more house updates/ decorating!

The Evolution of the Den

Of all of the rooms in our house, the den is probably the closest to being finished. We figured that most people who come over will see this room, so we concentrated our efforts there.

The den had humble origins.
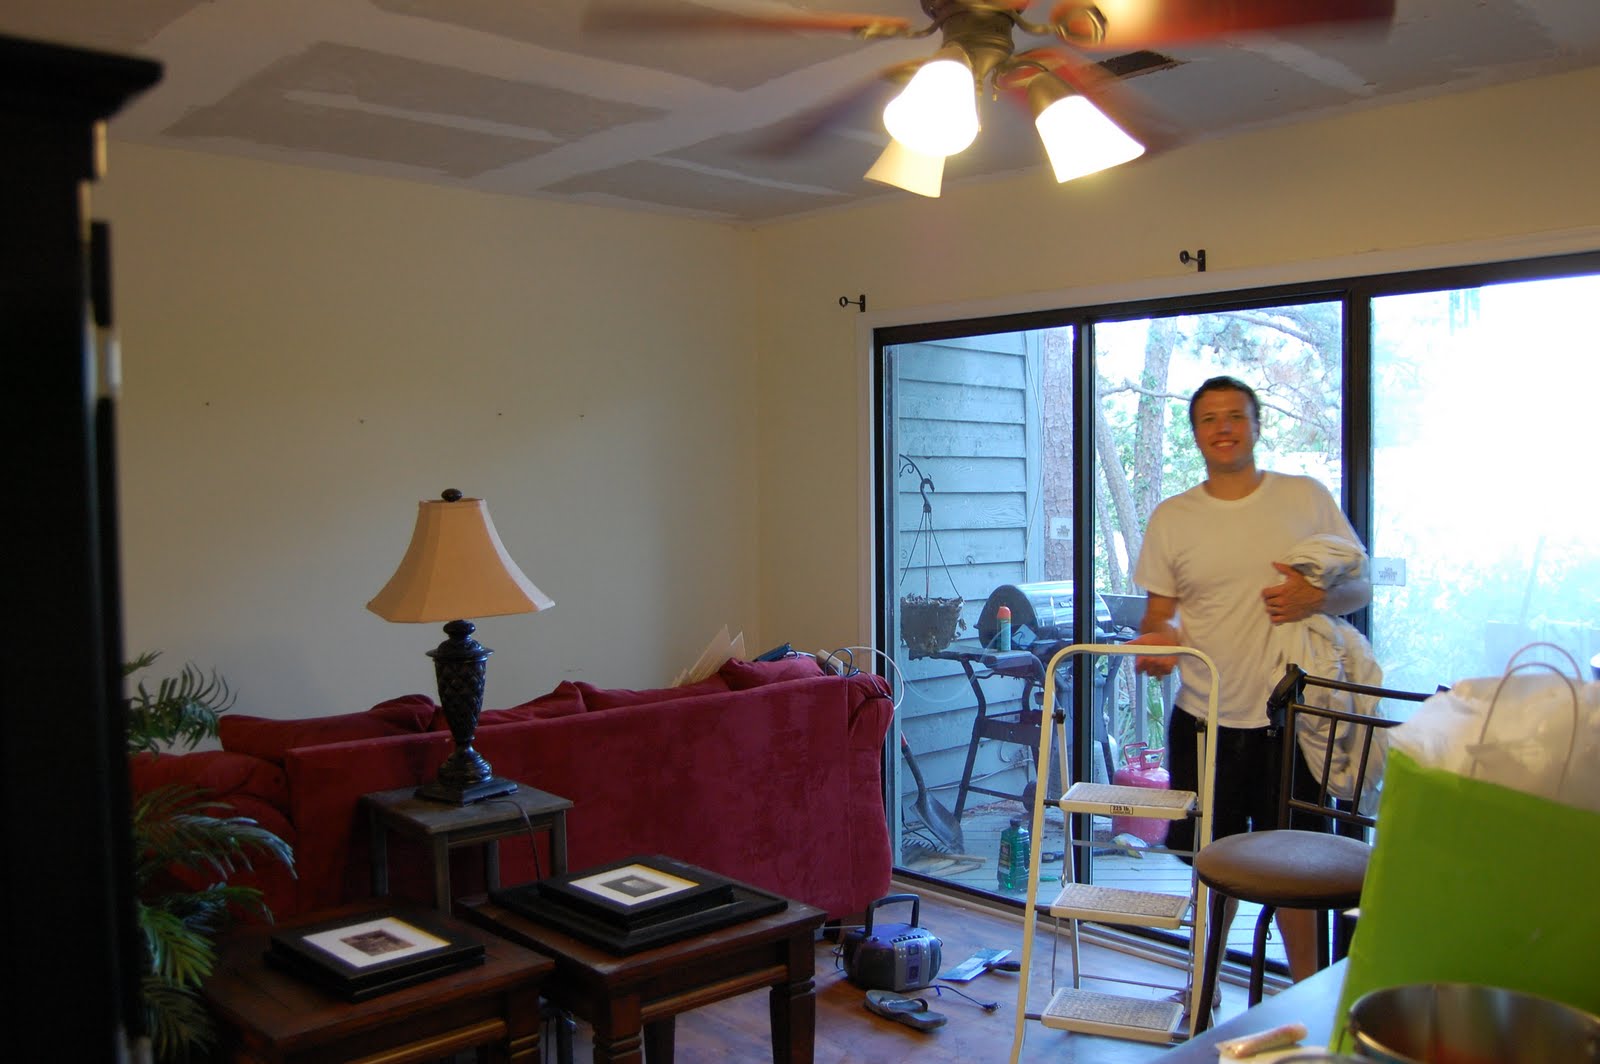
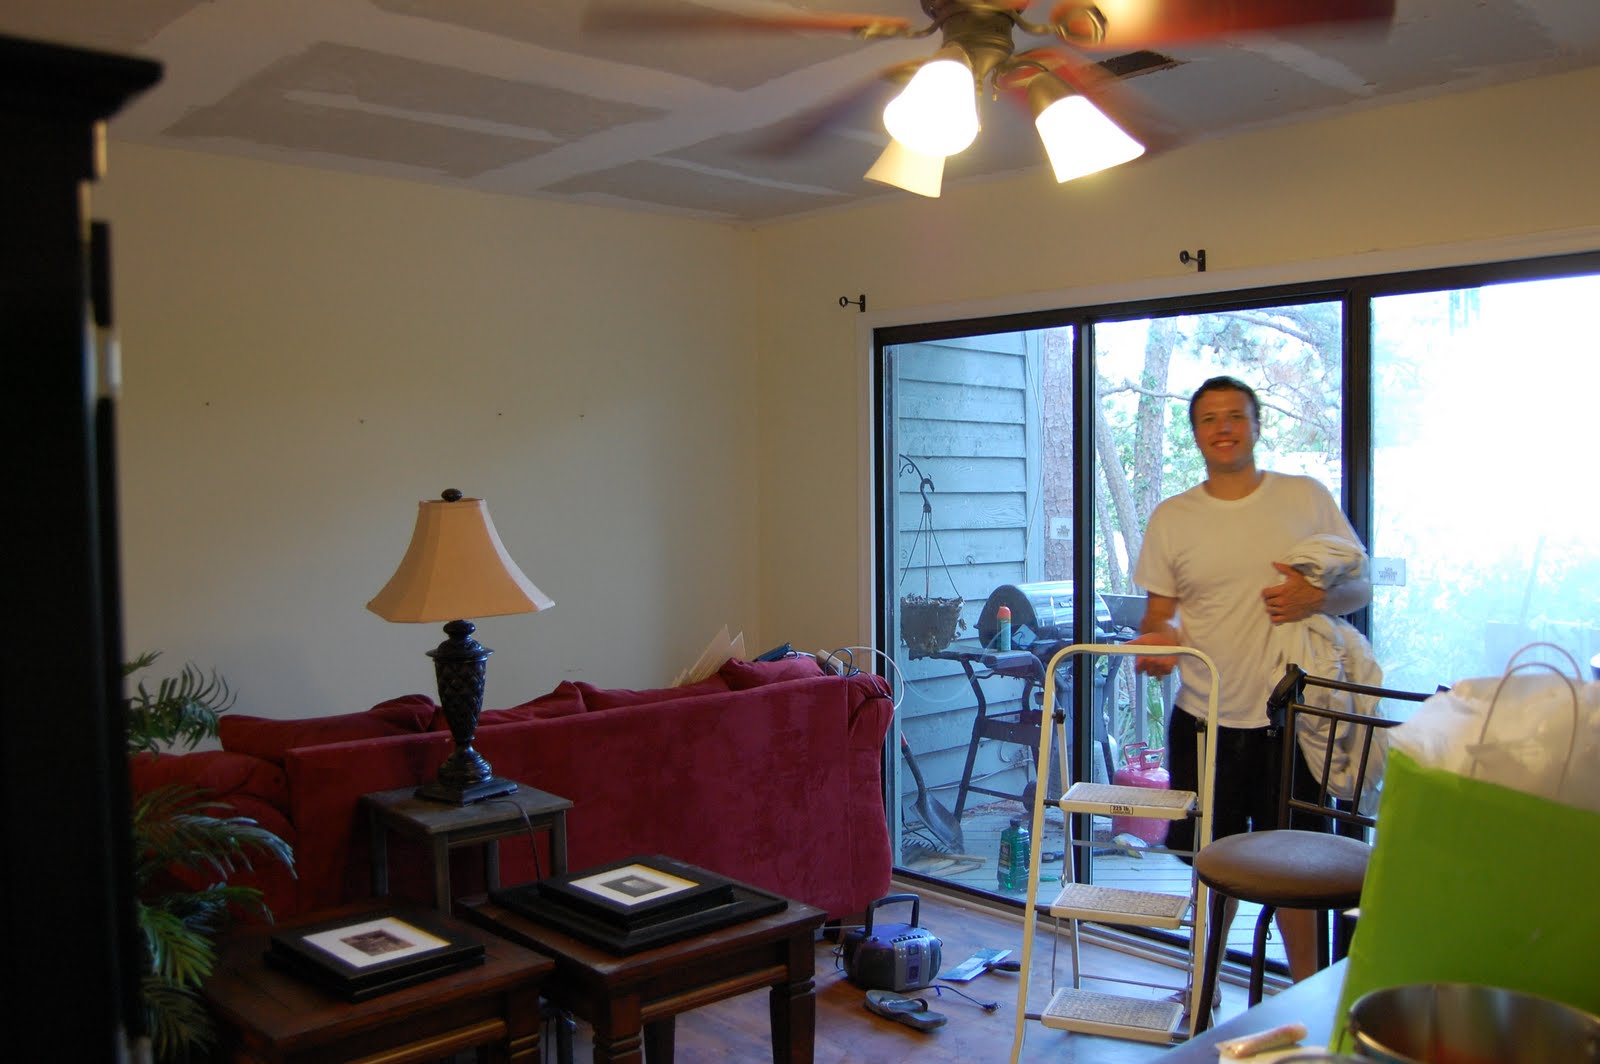
Before the curtains were up. Pretty much the first day we moved in.
Then, we decided to scrape the popcorn ceiling. NOT my favorite project.
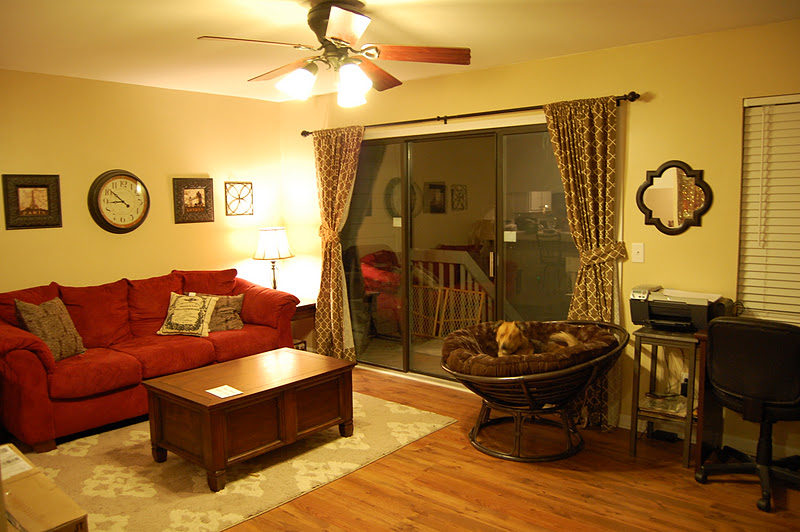
Here it is, in all of its newly painted glory (Valspar Churchill Hotel Wheat, for those of you interested). The furniture is mostly in place:

Next comes a rug from Target to tie everything together.


For Christmas, I got a desk and a papasan. Yay for more storage and seating!
Spot the puppy!

Second Bedroom, 2.0

Whoooooo's happy about our second bedroom/ office? 

We are!

In large part to some amazing Christmas gifts from my sister, the second bedroom is turning into something worth looking at.

Behold it in its original glory:

This is a particularly rough picture of the room, as it was right before painting. I promise, we don't usually keep our house looking crack-den chic.

After painting the pale yellow walls to a grey-beige, and a visit to Pier One for pillows and lamps:

Sloooooowly, sloooooowly, we're getting there! Note the completely empty bookshelves--a sight that may never happen again in our household.


AND NOW! Here is it today: 


The design rundown:
  • New white 5-shelf bookshelves (Walmart. $25/each)
  • Sleeper sofa (free. Donated by a friend)
  • Glass lamps (Pier One. On sale for $50/each; regularly $75/each)
  • Velvet pillows (Pier One. On sale for $20/each)
  • Long bird pillow (Pier One. $40/each)
  • Blue and white chain pillows (Target, two years ago. $15/each)
  • White sheer curtains. (Bed Bath and Beyond, two years ago. Given as wedding gifts)
  • Owl mirror (Earthbound Trading Company. $30)
  • Owl tryptich (Pier One. Given as gifts)

11 December 2011

Master Bedroom: In the Works

When we bought the house, before the master bedroom was painted: 


After the bedroom was painted--with no decorations and with the bed in the middle of the room:

Then, the bed was moved over to the side of the room, giving us more room on the left:


To come: more wall art, a bookcase, and a chair! It may be taking a while to tackle all of these projects, but I'm excited to see them slowly come together!

02 July 2011

Kitchen Decorations

For the kitchen (which is our next big project to tackle), I have BIG ideas for the decorations. There's one long wall that screams out for something fun and funky. For some reason, I've been hung up on a focal point that has the following two requirements:
1. It must be of epic proportions. No 8x10 picture for our kitchen wall.
2. It must have something to do with subway or bus signs. Don't ask me where this came from. Just go with it. :)

A few ideas that I've been tossing around:
A reproduction of a bus blind in London from the Transportation for London Museum Shop. When I lived there, I used to take the 11 bus all of the time (my stop: Chelsea, World's End). If I can't live in London, I can bring London to me!

Another poster from TfL Museum: I adore the bold black and white graphics on this one. It's London but done in the coolest way possible. Both of the TfL posters come in a variety of sizes so I could get a BIG one like I really want.

Or, what about these subway sign panels from Flying Junction store on Etsy?


27 June 2011

Oh, Happy Day! {The Living Room Before and After}

The ceilings have been scraped. They have been painted.

The walls have been repainted. The furniture has been put back in place.

And we have a new and improved den!

Before:
Notice the unfinished ceilings and the horrible yellow paint that is more suitable for a nursery than a den

AFTER!
The living room is on its way to joining the 21st century! I love the new paint color (Valspar Churchill Hotel Wheat). New lamp shades and a new rug are on their way!

25 June 2011

Ceilings: Before and After

KITCHEN
Before 
when the kitchen ceilings still had their popcorn-ness
and when the old (horribly dim) florescent light still existed in the kitchen

Kitchen
AFTER
shiny, smooth ceilings
shiny new light fixture!


I don't have a picture of the living room before, so use your imagination!!

Living Room
AFTER

I think we are ALL so glad to be done with this project--it was messy and time-consuming, but 150% worth it.

On to painting the downstairs tomorrow!!

19 June 2011

Tearing My Hair Out

We're to the point in our kitchen project where we just want to take a wrecking ball to the whole thing. Will it never be done??

The last round of ceiling sanding is going painfully slow since Landon broke his hand last week. We discovered sagging wallpaper under the kitchen paint, so that's had to come down, too. The wallpaper didn't release like it should, so we've had to sand and peel the wallpaper backing off veeeeeerrrry slooowwwly.

So, even though we've been working on this project for several days, you can't really tell that we're making that much forward movement.

Eleven days until Landon's friend's bachelor party descends on the house! EEK!

17 June 2011

Tearing up the Place

Our house has gone from bad to worse. In the process of prepping the ceiling for primer and paint, we discovered that there is (was) wallpaper under the layers of paint in our kitchen. Hideous, blue and brown striped wallpaper. Yuck!

So, in addition to sanding the ceiling last night, I also had to begin the process of ripping the painted wallpaper down so that our new paint will go on smoothly (lest we create even MORE work for ourselves). Our house honestly looks like some homeless squatters should be living it in! (Pics to come!)

And to make things even worse, Landon broke his right hand falling off of a ladder Tuesday night, so I'm the only able-bodied one for the time being. What ELSE could happen???

I just want to finish all of the painting by the time Landon has some friends down in July for a bachelor party (not his own, but a friend of ours). If we're done painting, I can at least put the furniture back in place before they get here.

13 June 2011

Halftime Report: De-popcorning the ceilings

As I mentioned in my earlier post, Landon and I have decided to upgrade the ceilings from the popcorn ceilings in all their 1987-glory to smooth, painted ceilings--hopefully, bringing another portion of our house into the 21st century (watch out kitchen and bathrooms: you're next!).

Landon is just finishing up downstairs with the scraping, and we'll be able to move onto the spackeling and  sanding tomorrow or the next night, followed soon by the actual painting of the ceiling.

Here's where we were as of two hours ago:
ALL of our furniture from the downstairs--the pictures, the kitchen table, the couch and anything else you can imagine--is now crammed into the 450 square feet or so of our living room. We're doing anything but living in it, as you may imagine.

The clean, non-popcorn ceiling in the den. Oh, how lovely it will look when we have painted it white.

Still left to do: the kitchen (the white portion of the ceiling) in contrast to the already scraped foyer.